INSTRUCTION MANUAL
DNN991HD/ DNN9710BT
CONNECTED NAVIGATION SYSTEM
INSTRUCTION MANUAL
CONNECTED NAVIGATION SYSTEM
The method for turning on the power varies between different models.
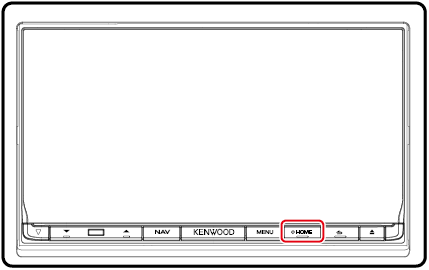
The unit is turned on.
Press the <HOME> button for 1 second.
If it is your first time turning the unit on after installation, it will be necessary to perform Initial setup.
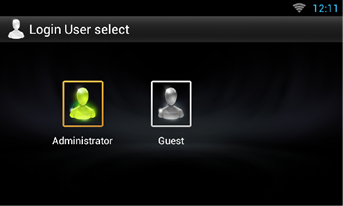
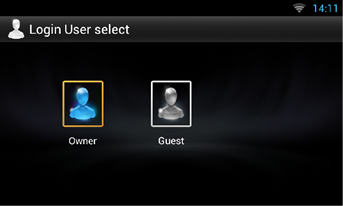
When you selected Administrator or Guest, you do not need to enter a password.
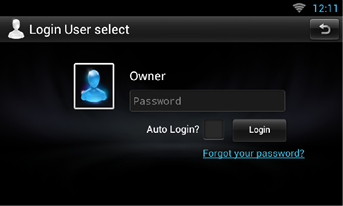
[Auto Login?]: Checking this checkbox allows you to log in to the system automatically from the next time.
|
NOTE
|
Perform this setup when you use this unit for the first time or when you reset the unit. See Resetting the Unit.

|
Language Setup |
|
Select the language used for the GUI and input methods. Default is “English (United States)”.
|
|
WiFi Setup |
|
Configure settings for connection to Wi-Fi.
For details on operation, see Wi-Fi Setup. |
|
Mobile Network settings (DNN991HD) |
|
Set the direct Internet connection with 4G/3G Dongle.
For details on operation, see 4G/ 3G Dongle Setup. |
|
Date Setup |
|
Set the date and time.
For details on operation, see Clock and Date Setup. |
|
Account Setup |
|
Set the information about the user of this unit.
For details on operation, see About Account. |

|
Locale |
|
Select the country for the navigation system.
|
|
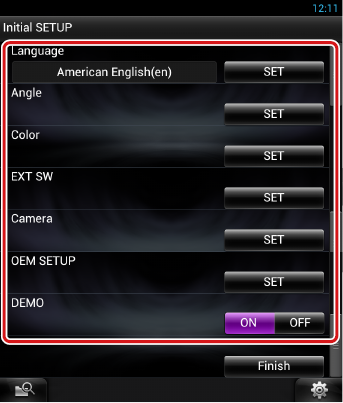
Language |
|
Select the language used for the control screen and setting items. Default is “American English (en)”.
For details on operation, see Language setup. |
|
Angle |
|
Adjust the position of the monitor. Default is “0”.
For details on operation, see Monitor angle control. |
|
Color |
|
Set the screen and button illumination color. You can select whether to allow color scan operation or select a fixed color for operation.
For details on operation, see Panel color coordinate. |
|
EXT SW |
|
Control the external devices.
For details on operation, see EXT SW setup. |
|
Camera |
|
Set the parameters for the camera.
For details on operation, see Camera Setup. |
|
OEM SETUP (North America Sales area only) |
|
This function requires a commercial adaptor. Consult your Kenwood dealer for details. |
|
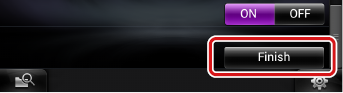
DEMO |
|
Set the demonstration mode. Default is “ON”.
|
|
NOTE
|
![]()
![]()
© 2014 JVC KENWOOD Corporation
